插件
留言板
下载安装
npm install --save vuepress-plugin-comment
npm install --save valine

or

yarn add vuepress-plugin-comment -D
yarn add valine -D
注册LeanCloud
进入官方网站LeanCloud,注册你自己的账号并登录
创建应用
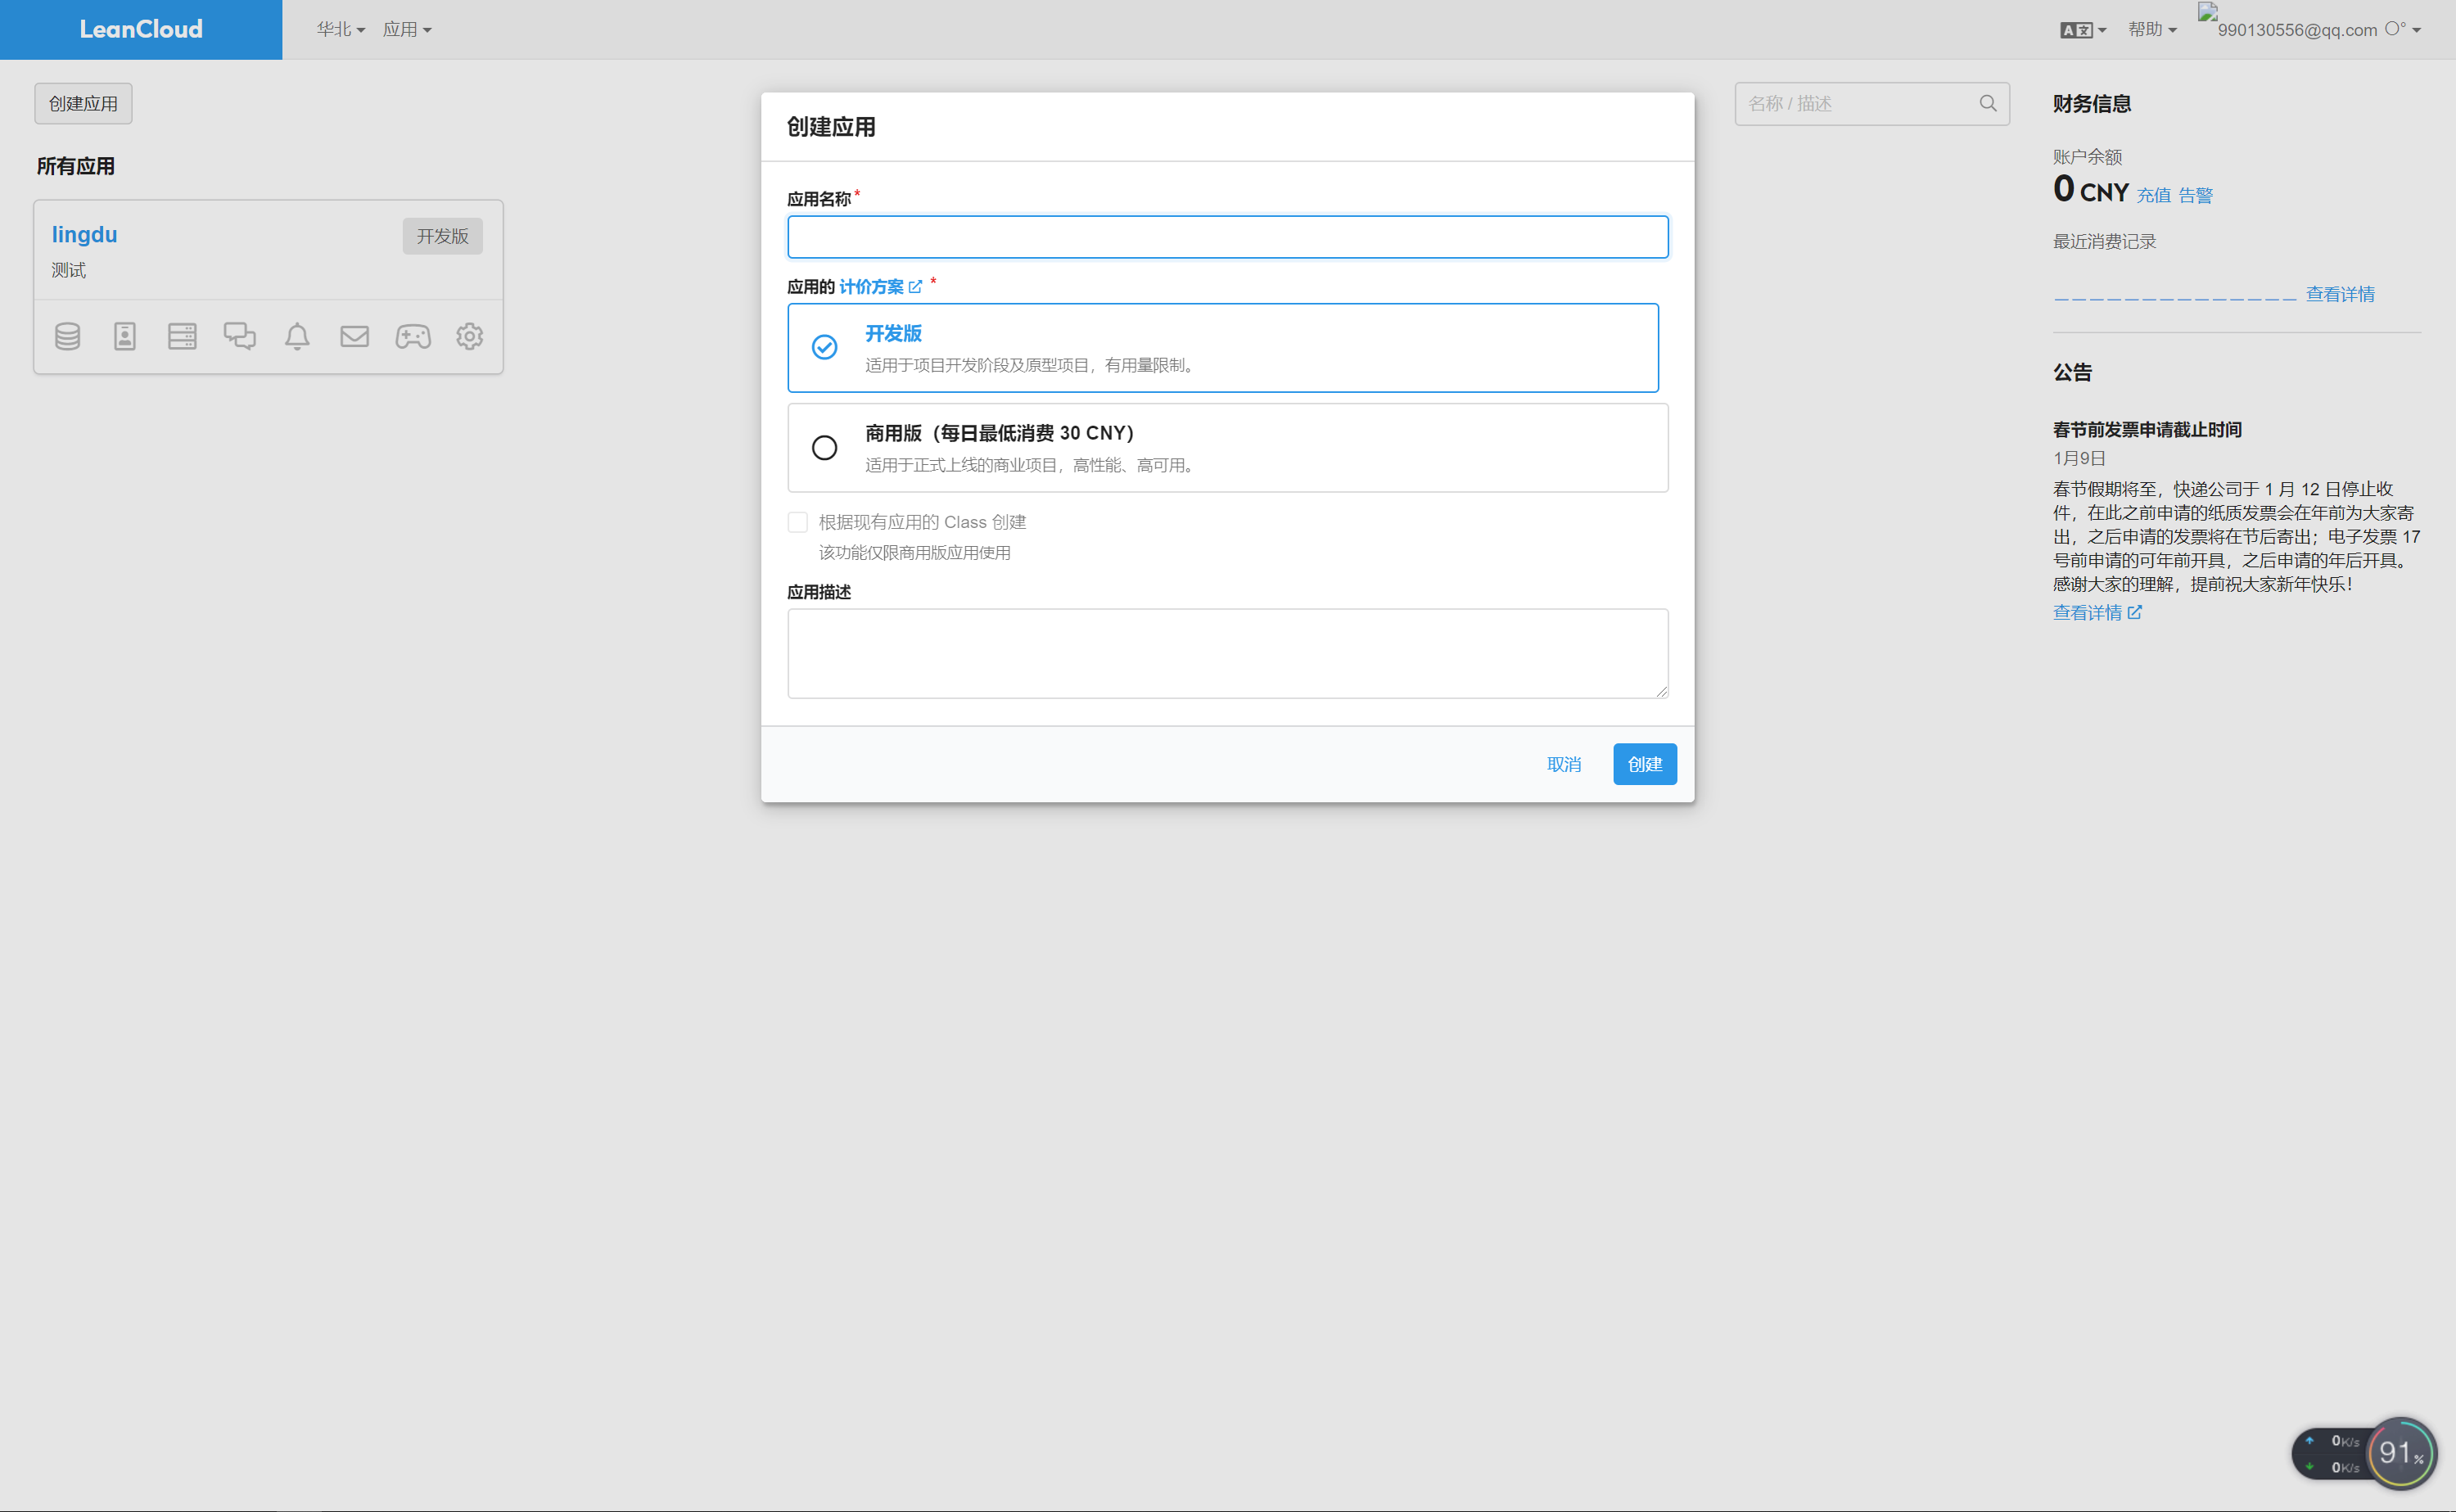
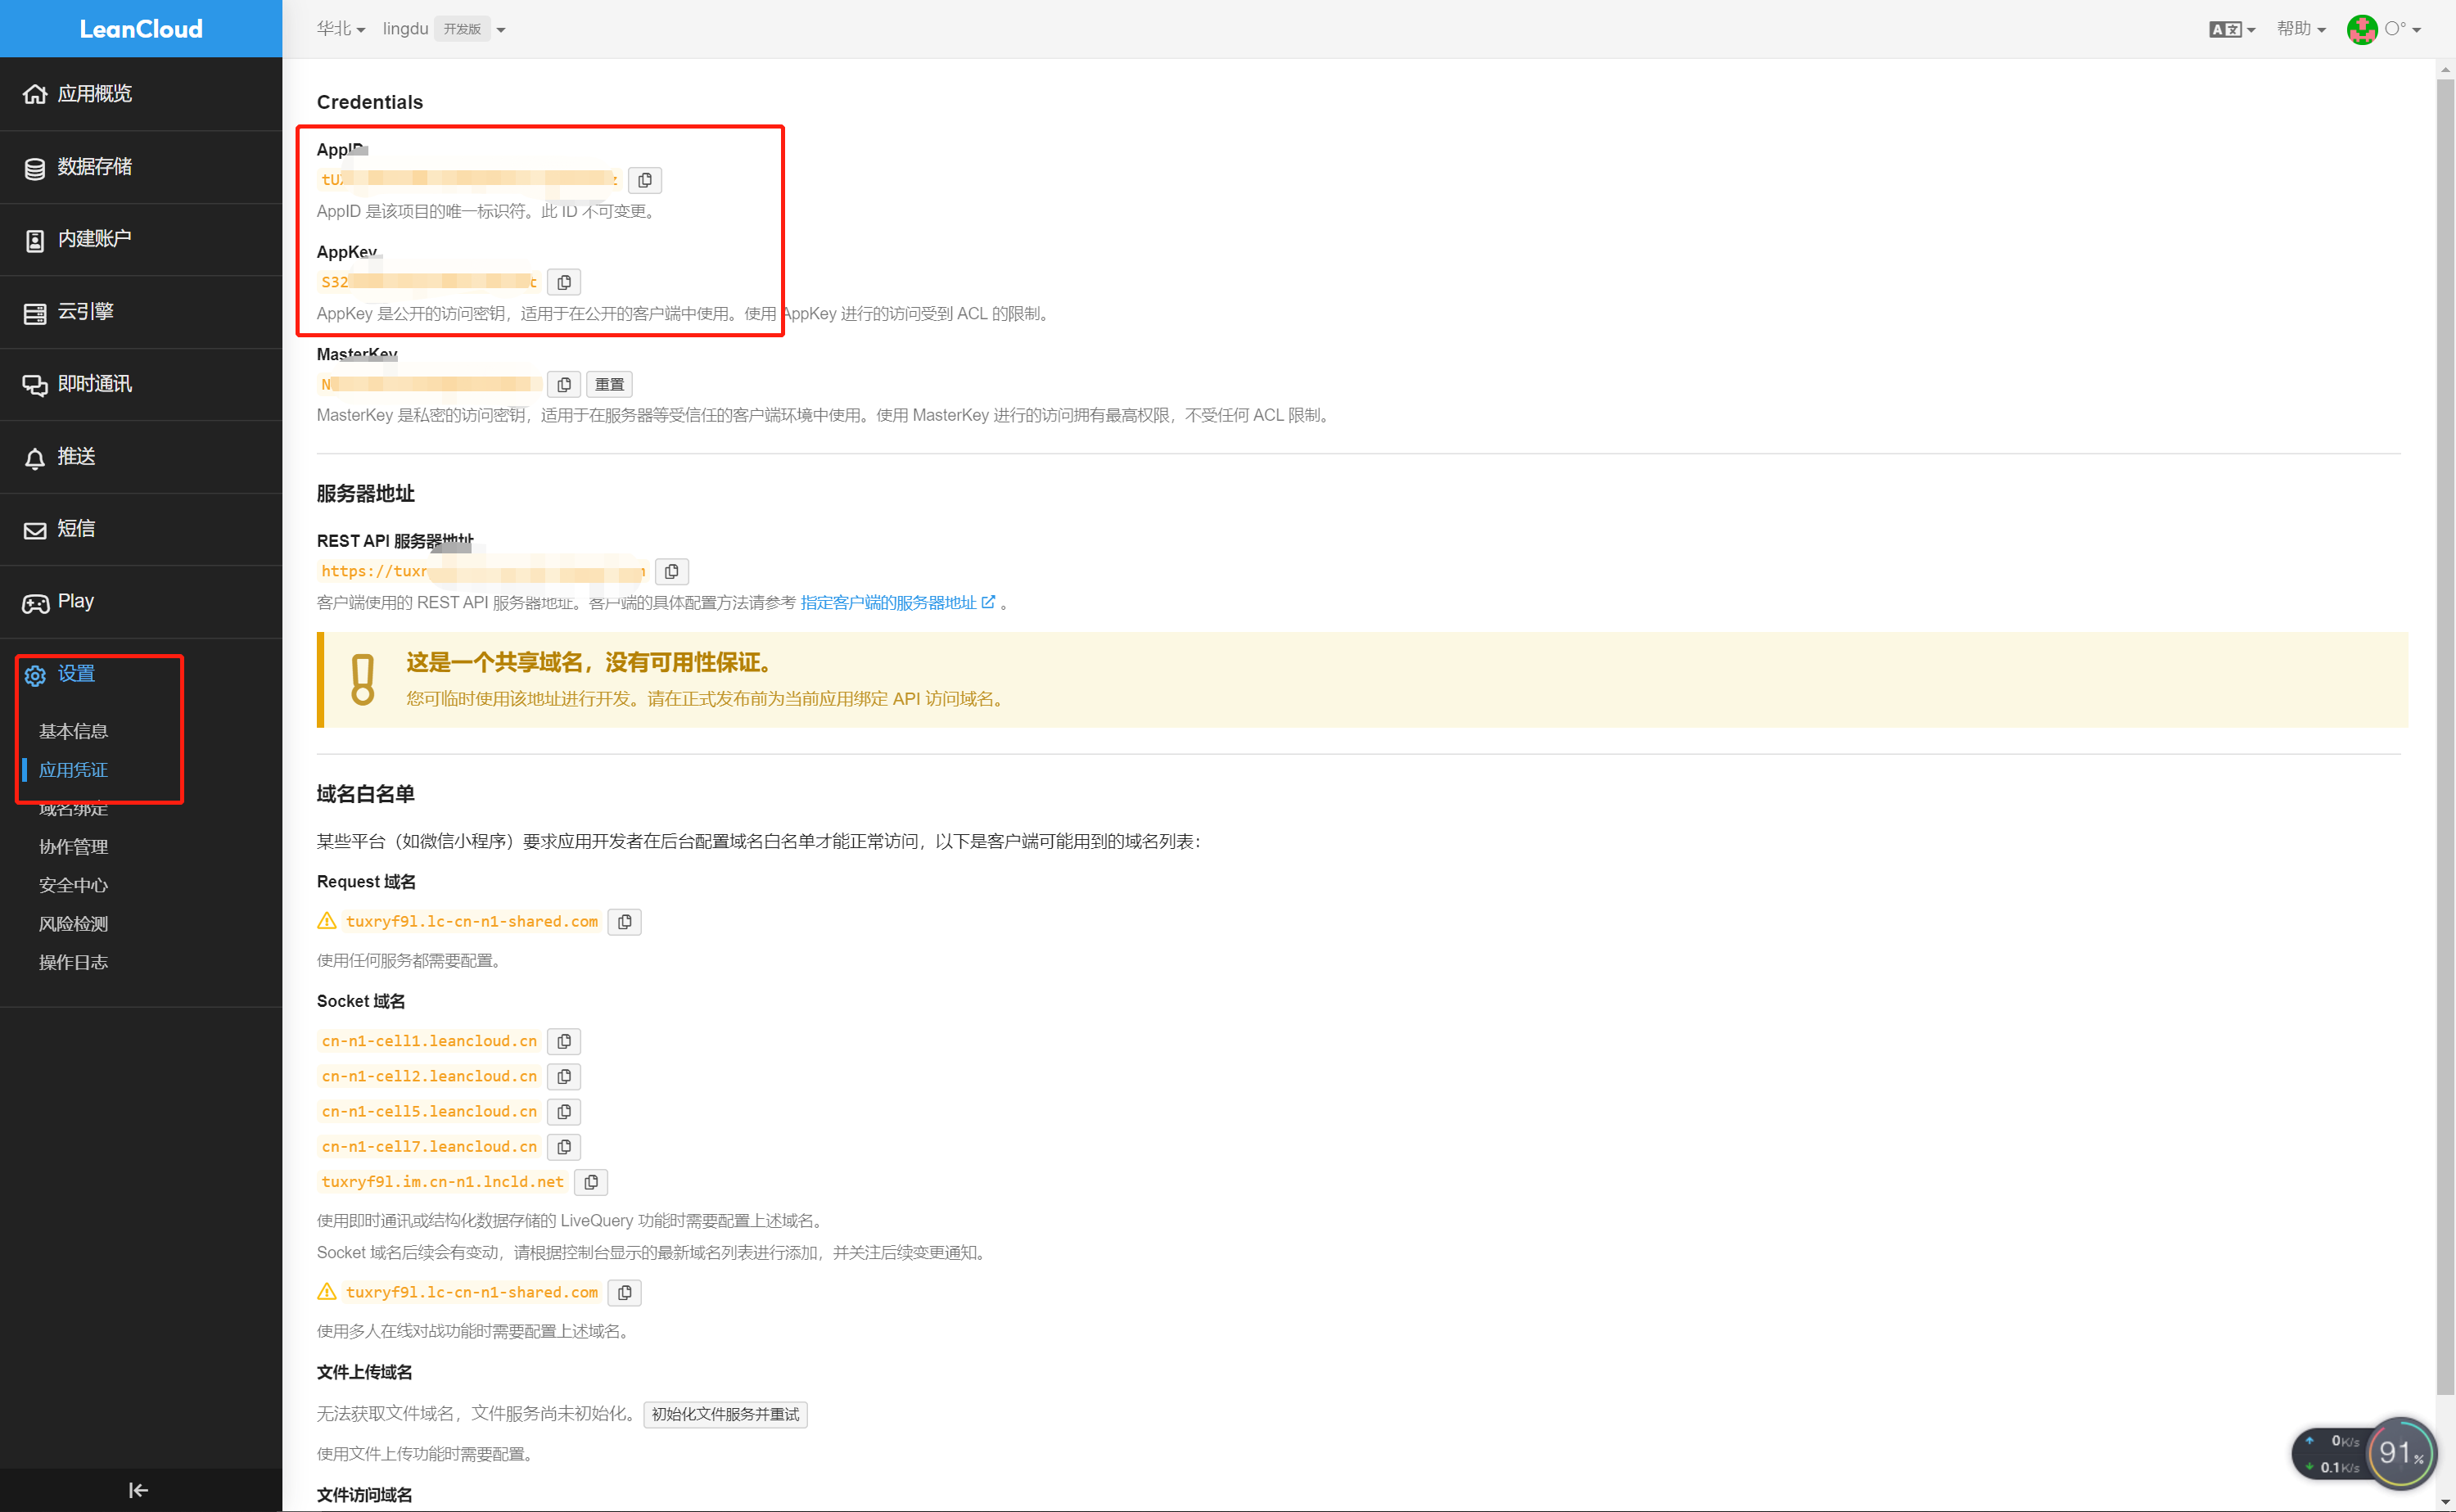
找到AppID和AppKey稍后会用到,该步骤很关键。
提示
评论分为两种,单页面使用或者多页面使用
多页面使用(不推荐)
多页面使用的理解就是:当你在Config.js中配置完成后,你的所有页面都自动被安排上了Valine功能,包括一些你不想要安排的页面也被安排上。
将 vuepress-plugin-comment 添加到vuepress项目的插件配置中:
module.exports = {
    plugins: {
        'vuepress-plugin-comment': {
            choosen: 'valine',
            // options选项中的所有参数,会传给Valine的配置
            options: {
                el: '#valine-vuepress-comment',
                appId: 'Your own appId',
                appKey: 'Your own appKey'
            }
        }
    }
}
单页面使用(推荐)
单页面使用的理解就是:当你把基础配置的都配置完成后,你想在哪个页面指定配置评论功能,就可以在md文件中写
<valine></valine>来调用评论功能
单页面通过组件来实现功能
.vuepress/config.js配置文件中加入
module.exports = {
    plugins: {
        '@vuepress/register-components': {
            componentsDir: './components'
        }
    }
}
提示
这是设置自定义组件的位置。然后在.vuepress/components目录中创建文件Valine.vue,这是用于自定义自己的 Valine 组件。 Valine.vue 的源码如下,这里我开启了阅读量统计。leancloud-visitors类所在的元素的 id 会用来识别页面所在位置。
<template>
  <section style="border-top: 2px solid #eaecef;padding-top:1rem;margin-top:2rem;">
    <div>
      <!-- id 将作为查询条件 -->
      <span class="leancloud-visitors"
            data-flag-title="Your Article Title">
        <em class="post-meta-item-text">阅读量: </em>
        <i class="leancloud-visitors-count"></i>
      </span>
    </div>
    <h3>
      <a href="javascript:;"></a>
      评 论:
    </h3>
    <div id="vcomments"></div>
  </section>
</template>

<script>
export default {
  name: 'Valine',
  mounted: function () {
    // require window
    const Valine = require('valine');
    if (typeof window !== 'undefined') {
      document.getElementsByClassName('leancloud-visitors')[0].id
        = window.location.pathname
      this.window = window
      window.AV = require('leancloud-storage')
    }

    new Valine({
      el: '#vcomments',
      appId: 'XXXXXXXXXXXXX',// your appId
      appKey: 'XXXXXXXXXXXXX', // your appKey
      notify: false,
      verify: false,
      path: window.location.pathname,
      visitor: true,
      avatar: 'mm',
      placeholder: 'write here'
    });
  },
}
</script>
使用
然后在你所写的 md 文件中使用这个标签就行,比如在最下面一行键入
<Valine></Valine>
效果:
图片放大
注意
仅适用于vuepress v1.x
下载安装依赖
npm install -D @vuepress/plugin-medium-zoom
配置
简单使用:
// .vuepresss/config.js
module.exports = {
    plugins: {
        '@vuepress/medium-zoom': {}
    }
}
自定义选项:
module.exports = {
  plugins: {
    '@vuepress/medium-zoom': {
      // selector: 'img.zoom-custom-imgs',
      // medium-zoom options here
      // See: https://github.com/francoischalifour/medium-zoom#options
      options: {
        margin: 16,                             // 外边距
        background: 'rgba(255,255,255,0.39)',   // 背景色
        scrollOffset: 100                       // 滑动关闭像素
      }
    }
  }
}
选项
- selector
- 类型:
string - 默认值:
.theme-default-content :not(a) > img
值得注意的是,.theme-default-content是默认主题添加给<Content />组件的 class name。
- 类型:
- options
- 类型:
object - 默认值:
undefined
- 类型:
options参数如下:
| 属性 | 类型 | 默认值 | 描述 |
|---|---|---|---|
| margin | number | 0 | 放大图像外的空间 |
| background | string | #ff | 叠加的背景 |
| scrollOffset | number | 40 | 要滚动以关闭缩放的像素数 |
| container | string || HTMLElementobject | null | 视图端口以显示放大 |
| template | string || HTMLTemplateElement | null | 缩放时显示的模板元素 |
记录当前浏览的位置信息
注意
仅适用于vuepress v1.x
介绍
该插件在页面关闭时,记录当前浏览的位置信息。用来在下一次访问时,展示一个前往该位置的弹窗。
默认的弹窗样式与 @vuepress/plugin-pwa 一样。
安装
yarn add vuepress-plugin-last-reading
## or
npm i vuepress-plugin-last-reading
使用
module.exports = {
  plugins: [
    'last-reading'
  ]
}
选项
popupConfig
- 类型:
Object - 必须:
false
弹出组件中显示的默认提示文本内容。
module.exports = {
  plugins: [
    ['last-reading', {
      popupConfig: {
        message: '返回之前位置',
        buttonText: '确定'
      },
    }]
  ]
}
或者参考 i18n 配置多语言。
popupCountdown
- 类型:
Number - 默认值:
10000 - 必须:
false
配置弹窗显示的时间。
popupComponent
- 类型:
string - 必须:
false
用于替换默认弹出组件的自定义组件,参考自定义弹窗样式。
popupCustom
- 类型:
Function - 必须:
false
自定义弹窗相关逻辑。
提示
如果配置该选项,请通过下面方式定义函数
module.exports = {
  plugins: [
    ['last-reading', {
      popupCustom: function() {
        const now = new Date().getTime()
        if (now - this.lastReading.timestamp > 30 * 24 * 60 *60 * 1000) {
          this.clean()
        } else if (this.$route.path === this.lastReading.path) {
          this.goto()
        } else {
          this.show = true
          setTimeout(this.clean, 10000)
        }
      },
    }]
  ]
}
自定义弹窗样式
首先,您需要在 .vuepress/components 中创建一个全局组件 (例如 MyPopup)。 一个基于默认组件创建的简单组件如下:
<template>
  <LastReadingPopup v-slot="{ show, goto, message, buttonText }">
    <div v-if="show" class="my-sw-update-popup">
      {{ message }}<br>
      <button @click="goto">{{ buttonText }}</button>
    </div>
  </LastReadingPopup>
</template>
<script>
import LastReadingPopup from 'vuepress-plugin-last-reading/src/LastReadingPopup.vue'
export default {
  components: { LastReadingPopup }
}
</script>
<style>
.my-sw-update-popup {
  text-align: right;
  position: fixed;
  bottom: 20px;
  right: 20px;
  background-color: #fff;
  font-size: 20px;
  padding: 10px;
  border: 5px solid #3eaf7c;
}
.my-sw-update-popup button {
  border: 1px solid #fefefe;
}
</style>
接着,更新你的插件配置:
module.exports = {
  plugins: [
    ['last-reading', {
      popupComponent: 'MyPopup'
    }]
  ]
}
阅读进度条
注意
仅适用于vuepress v1.x
vuepress-plugin-reading-progress
面向 VuePress2 的常用组件
vuepress-plugin-components
安装
pnpm add -D vuepress-plugin-components
yarn add -D vuepress-plugin-components
npm i -D vuepress-plugin-components
使用
// .vuepress/config.ts
import { componentsPlugin } from "vuepress-plugin-components";

export default {
  plugins: [
    componentsPlugin({
      // 插件选项
    }),
  ],
};
// .vuepress/config.js
import { componentsPlugin } from "vuepress-plugin-components";

export default {
  plugins: [
    componentsPlugin({
      // 插件选项
    }),
  ],
};
官方文档
公告窗改装成音乐播放器
描述
利用公告插件嵌入网易云音乐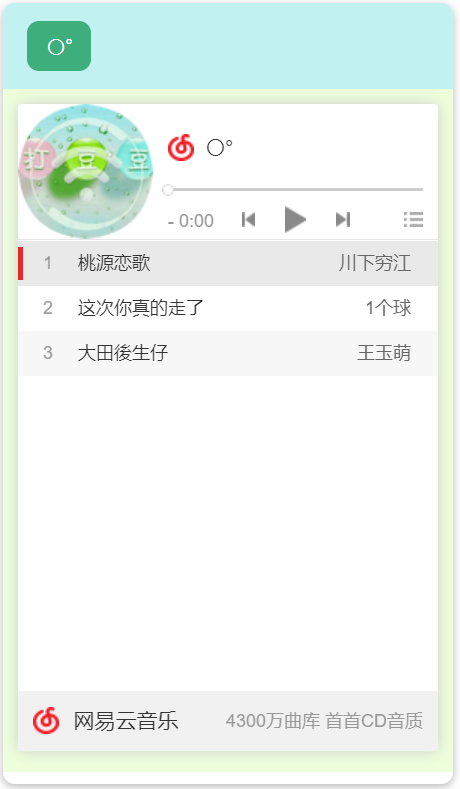
1.开启公告窗口
import { componentsPlugin } from "vuepress-plugin-components";

export default {
  plugins: [
    componentsPlugin({
      // 公告插件
      rootComponents: {
        notice: [
          {
            path: "/",
            title: '<div id="lingdu-tishi"><button id="btnMove" type="button" class="notice-footer-action primary">〇°</button></div>',
            // content: "Notice Content",// 内容 这里嵌入网易云播放器
            content: "<iframe frameborder=\"no\" border=\"0\" marginwidth=\"0\" marginheight=\"0\" width=100% height=450 src=\"//music.163.com/outchain/player?type=0&id=5163968960&auto=1&height=430\"></iframe>",
            // 关闭全屏显示
            fullscreen: false,
            // 需要确认才关闭否则延时关闭
            confirm: true,
          },
        ],
      },
    }),
  ],
};
2.添加脚本使窗口最小化
在.vuepress/public/js下创建gonggao.js
gonggao.js代码
/**
 * 延迟 4000 毫秒后执行 showMessage 函数 【这里用一个对象接收就会只执行一次,否则跳转页面会执行多次】
 */
const constResize=setTimeout(resize, 4000);

/**
 * 调整大小
 */
function resize() {
  let myDiv;
  let ok=false;
  let x = 100, y = 100, h; // 初始位置
  let timer;
  let status = 1;// 状态默认1为最大化,0为最小化

  myDiv = document.getElementsByClassName("notice-wrapper")[0];
  const initialLeft = parseInt(myDiv.getBoundingClientRect().left); // 获取 myDiv 元素的初始水平位置
  const initialTop = parseInt(myDiv.getBoundingClientRect().top); // 获取 myDiv 元素的初始垂直位置
  const initialH = parseInt(myDiv.getBoundingClientRect().height); // 获取 myDiv 元素的初始高
  x = initialLeft
  y = initialTop; // 初始位置
  h = initialH; // 初始高度

  const tishi = document.getElementById("lingdu-tishi");
  tishi.innerHTML +="<span style='color: #282c34'>👈点击按钮最小化</span>";

  const btnMove = document.getElementById("btnMove");

  // btnMove.onclick = delayedMove;
  /**
   * 监测点击按钮事件
   */
  btnMove.onclick = function () {
    // console.log("点击了。。。")
    if(!ok){
      return;
    }
    if (status === 1) {
      timer = setInterval(moveDiv, 0); // 点击按钮后,每隔 50 毫秒执行一次移动操作
      status = 0
    } else {
      timer = setInterval(moveDiv2, 0); // 点击按钮后,每隔 50 毫秒执行一次移动操作
      status = 1

    }
  };
  ok=true;

  /**
   * 最小化
   */
  function moveDiv() {
    x += 2; // 每次向右移动 10 个像素
    myDiv.style.left = x + "px"; // 设置水平位置

    y += 4; // 每次向下移动 5 个像素
    myDiv.style.top = y + "px"; // 设置垂直位置

    h += -4;
    myDiv.style.height = h + "px";
    // 调整透明度
    myDiv.style.opacity = 0.3;

    if (x - initialLeft >= 225) { // 如果达到执行次数上限,停止定时器
      clearInterval(timer);
    }
  }

  /**
   * 还原
   */
  function moveDiv2() {
    x += -2; // 每次向右移动 10 个像素
    myDiv.style.left = x + "px"; // 设置水平位置

    y += -4; // 每次向下移动 5 个像素
    myDiv.style.top = y + "px"; // 设置垂直位置

    h += 4;
    myDiv.style.height = h + "px";
    // 调整透明度
    myDiv.style.opacity = 1;

    if (x - initialLeft <= 0) { // 如果达到执行次数上限,停止定时器
      clearInterval(timer);
    }
  }

}
3. 使脚本生效
在config.ts中配置项追加head项
// .vuepress/config.ts

// 配置
import {head, navbarMy, sidebarMy} from './configs';
export default ({
  head,
})
我这里head是引用进来的head.ts中追加
import type { HeadConfig } from '@vuepress/core'

const name='/vuepress-lingdu-v2'

export const head: HeadConfig[] = [
  // 添加浏览器图标
  ['link',{rel: 'icon',type: 'image/png',sizes: '16x16',href: `/vuepress-lingdu-v2/img/logo.png`,},],
  ['link',{rel: 'icon',type: 'image/png',sizes: '32x32',href: `/vuepress-lingdu-v2/img/logo.png`,},],
  ['link', { rel: 'manifest', href: '/manifest.webmanifest' }],
  ['meta', { name: 'application-name', content: 'VuePress' }],
  ['meta', { name: 'apple-mobile-web-app-title', content: 'VuePress' }],
  ['meta', { name: 'apple-mobile-web-app-status-bar-style', content: 'black' }],
  ['link',{ rel: 'apple-touch-icon', href: `/images/icons/apple-touch-icon.png` },],
  ['link',{rel: 'mask-icon',href: '/images/icons/safari-pinned-tab.svg',color: '#3eaf7c',},],
  ['meta', { name: 'msapplication-TileColor', content: '#3eaf7c' }],
  ['meta', { name: 'theme-color', content: '#3eaf7c' }],

  ['script', { src: '/vuepress-lingdu-v2/js/gonggao.js' }]// 追加项 引入js
]
